This is a bare bones, end-to-end alpha architecture test for a dynamic stack launching software ecosystem.
It has two basic parts:
- Development Environment
- Tycho API
To use this repo, set up Minkube, a desktop version of Kubernetes:
Minikube If you're on OS X, see the dev_env() function. source bin/stage dev_env should install virtualbox, the kubernetes CLI, and minikube. Being able to do it on your desktop repeatedly, and make mistakes quietly, makes a lot of difference in understanding container orchestrated development.
For Python,
Python 3.7.x
- Install Python 3.7.x
- python -m venv venv/stage
- pip install -r requirements.txt
The goal here is to get familiar with Minikube and how kube interacts with Docker in the comfort of your own desktop.
To test R Studio Server, run the script as follows. This brings up the R Studio Server Docker image inside Kubernetes (Minikube) on your desktop. You can inspect the running service with the kubectl command below. Note the rstudio line and the expression in the PORT column. The second port number is the port on the host machine the service is bound to.
Now we want to connect to our new service. This is a bit of a process...
$ source bin/stage rstudio run
$ kubectl get svc
NAME            TYPE        CLUSTER-IP       EXTERNAL-IP   PORT(S)          AGE
kubernetes      ClusterIP   10.96.0.1        <none>        443/TCP          29h
rstudio         NodePort    10.108.119.157   <none>        8787:31557/TCP   33m
Other important kubectl commands can be seen in action bin/stage.
To find the IP address Minkube is bound to:
$ minikube ip
192.168.99.107
So, if you have the jq json parser and wget on your machine, an expression like this might test the service:
$ wget -O- -q http://$(minikube ip):$(kubectl get svc rstudio -o json | jq .spec.ports[0].nodePort) | head -30 | grep rstudio.png
<h3 id="banner"><a href="http://www.rstudio.com"><img src="images/rstudio.png" width="78" height="24" title="RStudio"/></a></h3>
Or you can visit the URL in your browser:

To run Jupyter notebooks described here, try this:
bin/stage jupyter run scipy lab
The expression after the run, scipy, in this case, is substituted to pick the docker image from the page at the link provided.
The last parameter, lab, is optional. If supplied, the new UI (pictured below) is presented.
In any event, you will be promted for a token at the UI. In this trivial scenario, the token is printed in the logs. How do we get the logs. Try
$ . bin/stage jupyter stop datascience
service "jupyter-datascience" deleted
deployment.extensions "jupyter-datascience" deleted
(stage) [scox@mac~/dev/tycho]$ . bin/stage jupyter run datascience lab
kubectl run --generator=deployment/apps.v1 is DEPRECATED and will be removed in a future version. Use kubectl run --generator=run-pod/v1 or kubectl create instead.
deployment.apps/jupyter-datascience created
jupyter-datascience-5ddd8d9f9d-gn55p
service/jupyter-datascience exposed
(stage) [scox@mac~/dev/tycho]$ kubectl get svc jupyter-datascience -o json | grep nodePort
                "nodePort": 32724,
(stage) [scox@mac~/dev/tycho]$ source bin/stage klog jupyter | grep token
[I 03:22:30.496 LabApp] http://(jupyter-datascience-5ddd8d9f9d-gn55p or 127.0.0.1):8888/?token=a9d63e94e6de342ad9b4d53f96cceecc9d28b6c6ed0a2602
    to login with a token:
        http://(jupyter-datascience-5ddd8d9f9d-gn55p or 127.0.0.1):8888/?token=a9d63e94e6de342ad9b4d53f96cceecc9d28b6c6ed0a2602
^C
It uses kubectl to get the logs. Copy the token and paste it at the UI. You should get a screen like this:

A few observations:
The K8s Python API is extensive and robust.
Also, it's generally straightforward to find a mapping of the kubectl command line to the API.
That said, the API is also large and complex. We may want a design that tailors its surface area to our use cases. Also, it may be useful to implement contact with the container orchestrator via an API so that clients an switch between alternatives. This also decouples system requirements like Python versions.
Finally, a pod is one or more containers. So launching, deploying, and networking pods as K8s services gives us a lot of needed flexibility and control.
So, for those reasons, under the tycho subdirectory, you can find:
- model.py containing System, Container, and Limits classes. These provide a minimalist high level abstractions of services we will launch on a compute infrastructure.
- template a directory containing environment specific templates for projecting a model object (like System) into a Kubernetes Pod configuration.
- compute.py provides an abstraction for our environment's interface to K8s. For example, when the UI launches a container, it needs to call something to do that, get appropriate status information, and be able to monitor, update, and stop that job. Tycho will grow up to be that interface.
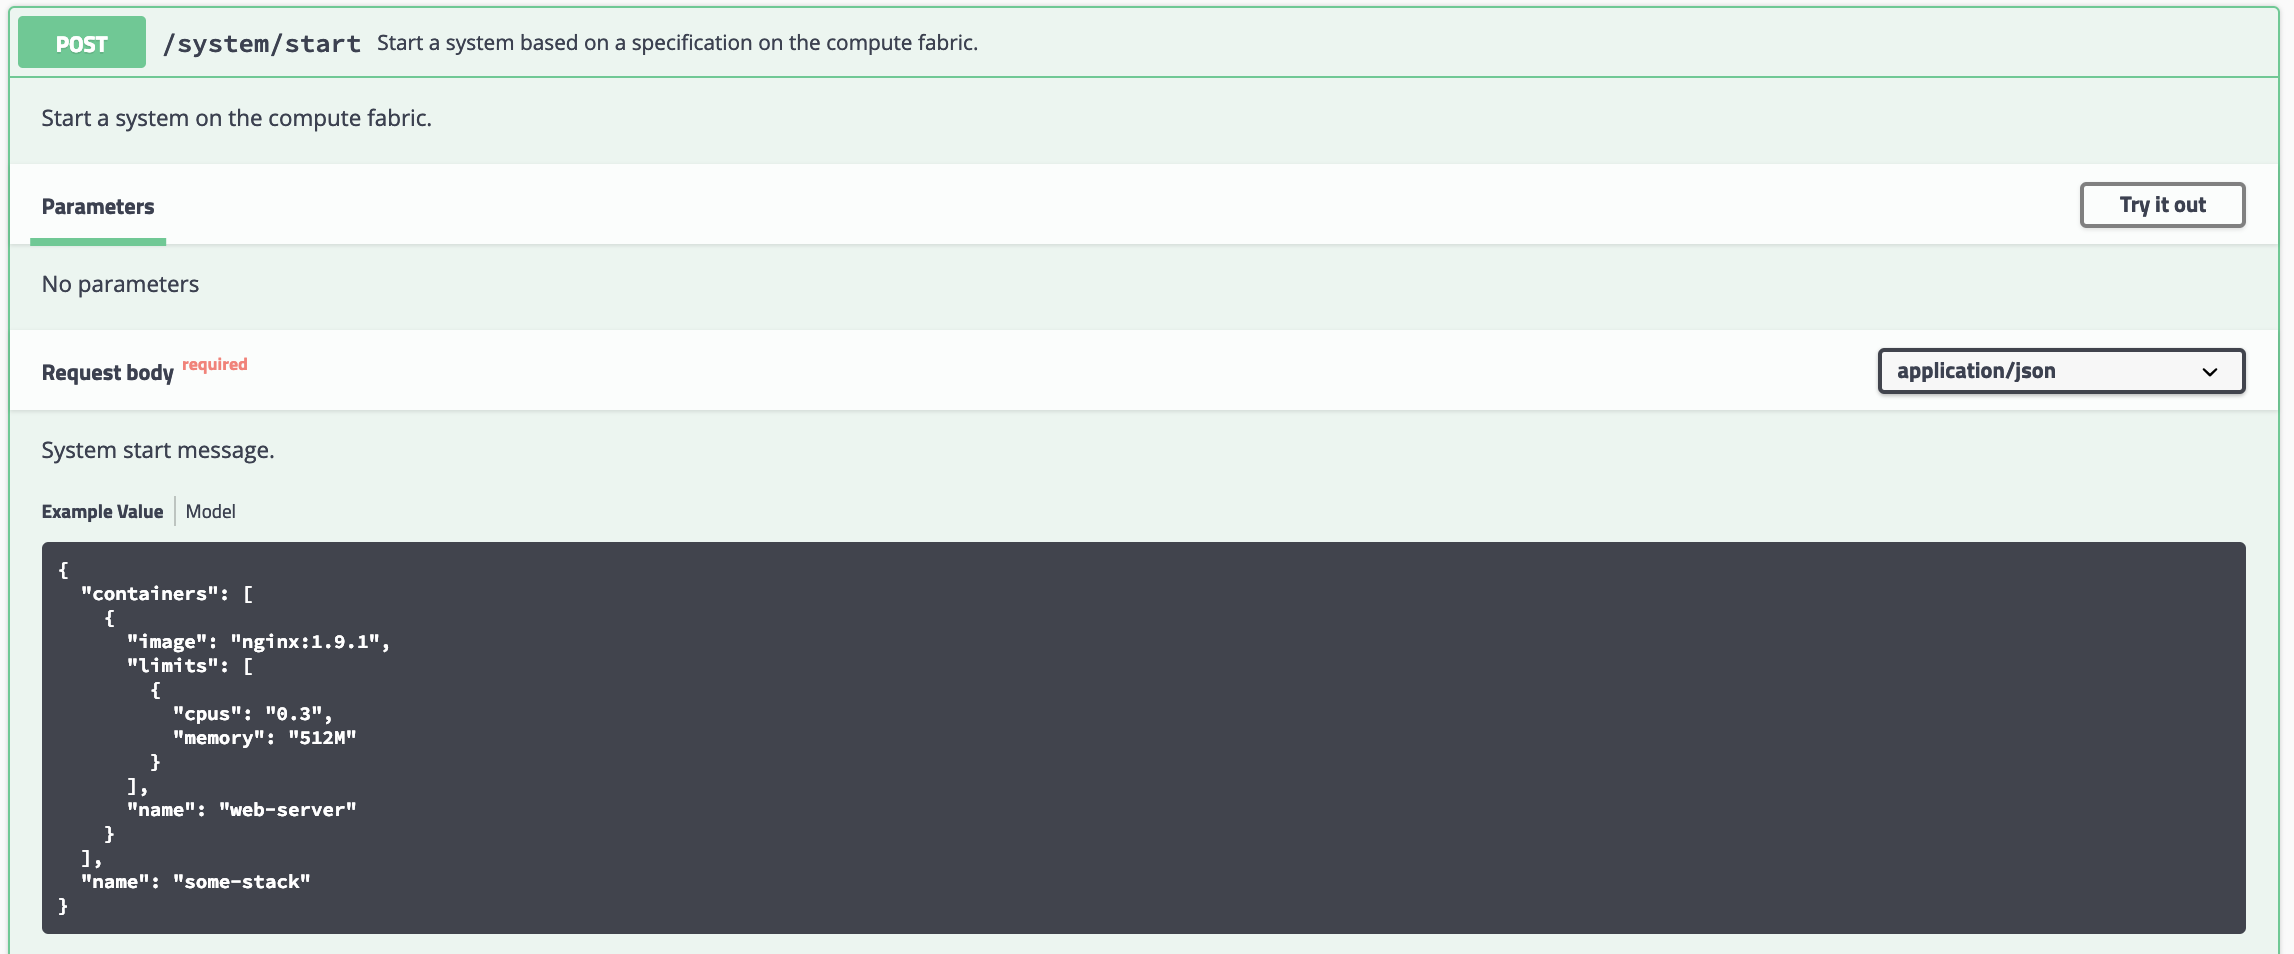
- api.py is a Swagger API to the compute module.
- test provides pytests for the model. Looking into options for testing the Kube portions.
This all works with minikube on your machine.
If you bring up the Swagger interface, you can try the example with your minikube instance.

You can test the newly deployed service with:
$ wget -O- -q http://$(minikube ip):$(kubectl get svc some-stack -o json | jq .spec.ports[0].nodePort) | head -30 | grep -i welcome
<title>Welcome to nginx!</title>
<h1>Welcome to nginx!</h1>
And go to the minikube UI to see what it did.
minikube dashboard
Finally, you can clean up the pod, deployment, and service created by running the example with this:
$ source bin/stage del_pod_dep_svc some-stack
deployment.extensions "some-stack" deleted
pod "some-stack" deleted
service "some-stack" deleted
- Logging add logging and appropriate configuration hooks.
- Spec the API with a view the UI and Security use cases.
- Sphinx Add documentation patterns.