A visual development platform for creating complex AI workflows using OpenAI assistants.
Download · Demo · Presentation · Discord
- Introduction
- Key Features
- Screenshots
- Installation
- Building
- Environment Setup (Optional)
- OpenAI Integration
- Building a Pipeline
- Profiles
- Projects
- Scheduling
- Functions
- Roadmap
- Community
- Credits
- License
Luminary provides tools for building workflows where multiple AI assistants can collaborate. It also supports custom code integration for more advanced data processing. By splitting complex tasks into smaller roles, you can reduce errors and hallucinations, and keep your projects organized and maintainable.
Note
Download for free from the Releases, check out the Demo Video, and explore the Overview Presentation. Join our community on Discord!
Want to start a merch shop?
- Create a pipeline that generates images, sends them to teespring
- Create merch items on teespring like shirts and mugs using the images (via api)
- Select and buy a domain and connect it to your teespring site (via cloudflare api or something like that)
- Create seo metadata for your site
- Create social media posts of your products and schedule them to post.
Want to start a survey website/app?
- Create an ai that asks the user what type of survey they want to build
- Collect information about what type of recommednations or call to actions need to be made
- Generate a data object that can be plugged into an app you are building which provides a great survey experience.
If you are building an app or tool that lets people make their own guide, website, flyer, schedule, trading bot, anything.... then you can use AI to make a pipeline that will make using your tool as easy as talking.
You design that AI pipeline in luminary, then export it to the standalone luminary pipeline engine library which can be imported into your project. This means you use the luminary tool to build and test the pipeline, then use it to run your own app or business.
- Multiple AI Assistants — Build complex AI workflows by orchestrating specialized assistants.
- Visual Graph Editor — Drag-and-drop nodes to design AI pipelines without tangling in code.
- Custom Code Integration — Extend functionality with Node.js, Python, or any language via command line.
- Profile & Project Management — Keep everything from pipeline configurations to custom functions neatly organized.
- Scheduling & Automation — Run pipelines at set times, perfect for routine tasks or batch processes.
- Desktop App & NPM Library — Use the visual environment or integrate workflows directly into your own Node.js projects.
To get started with Luminary, follow these steps:
-
Download the latest version for your platform from the GitHub releases page.
- Windows:
.exeinstaller - macOS:
.zipfile - Linux:
.debpackage
- Windows:
-
Install for your platform:
- Windows: Run the
.exeand follow the setup. - macOS:
- Extract the zip
- Double-click
install.command - Drag Luminary to
Applications - App is not signed/notarized, so Gatekeeper may prompt you
- If you get an error about the app being damaged, run:
xattr -c /Applications/Luminary.app
- Linux:
-
Replace
sudo dpkg -i luminary_x.x.x_<arch>.deb
<arch>with eitherarm64oramd64based on your download - If you encounter any dependency issues, run:
sudo apt-get install -f
- Launch Luminary from your applications menu or by running
luminaryin the terminal
-
- Windows: Run the
Note
No need for Node.js or Python unless you plan on running custom functions that require them.
Prerequisite
Ensure you have Node.js 16+ installed.
- Clone this repo.
- Run
npm install.
npm run electron:devThis concurrently starts the Angular dev server and launches Electron.
Tip: After it loads, pressCtrl+Rto refresh once Angular finishes building.
-
Windows:
npm run electron:build:win
Creates an installer in the
distfolder. -
macOS:
npm run electron:build:mac
Generates a
.dmgin thedistfolder.
Requires Xcode signing for a fully notarized build.
Skip this unless you are changing the way the application builds — the default scripts auto-generate these environment files.
- Run the setup script:
- macOS/Linux:
./scripts/setup-env.sh - Windows:
scripts\setup-env.bat
- macOS/Linux:
- Edit the generated files in
src/environments/to add any environment variables you need.
These files are .gitignored to keep your data safe.
These scripts are run automatically when you run npm run electron:dev via ./scripts/setup-env.js
Luminary is built around the OpenAI Assistants API, providing a structured interface for creating and managing AI workflows. The platform currently focuses exclusively on OpenAI's technology to ensure consistency across applications.
-
API Key: To use OpenAI assistants in Luminary, you need to have an OpenAI API key. You can obtain an API key from the OpenAI website. Once you have the key, you can set it in Luminary's settings.
-
API Usage Tier: OpenAI has different pricing plans for API usage. Luminary supports using the API at any tier, but some models and features may be locked, and you may experience rate limit issues, depending on your usage tier. To get a higher usage tier, you need to add more funds to your OpenAI API Account.
(The video pipeline shown in the example video was made with a single $50 deposit into a blank OpenAI Api account. This allowed for 450k TPM and the use of a 16k token gpt4o model)
We are exploring integration with additional AI technologies to expand Luminary's capabilities:
- Support for alternative language models
- LangChain integration for enhanced flexibility
- Extended model capabilities and custom model support
Creating an AI pipeline in Luminary involves a step-by-step process using three main components: Object Schemas, AI Assistants, and the Graph Pipeline. Here's a guide to building a pipeline, using a video generation workflow as an example:
Start by creating object schemas for all data types you'll pass between assistants:
- Open the Schema Editor UI or prepare JSON schema definitions.
- Create schemas for each data type. For our video generation example:
- Outline schema
- Script schema
- Video schema
- Define properties and validation rules for each schema.
- Save your schemas for use in assistant configurations.
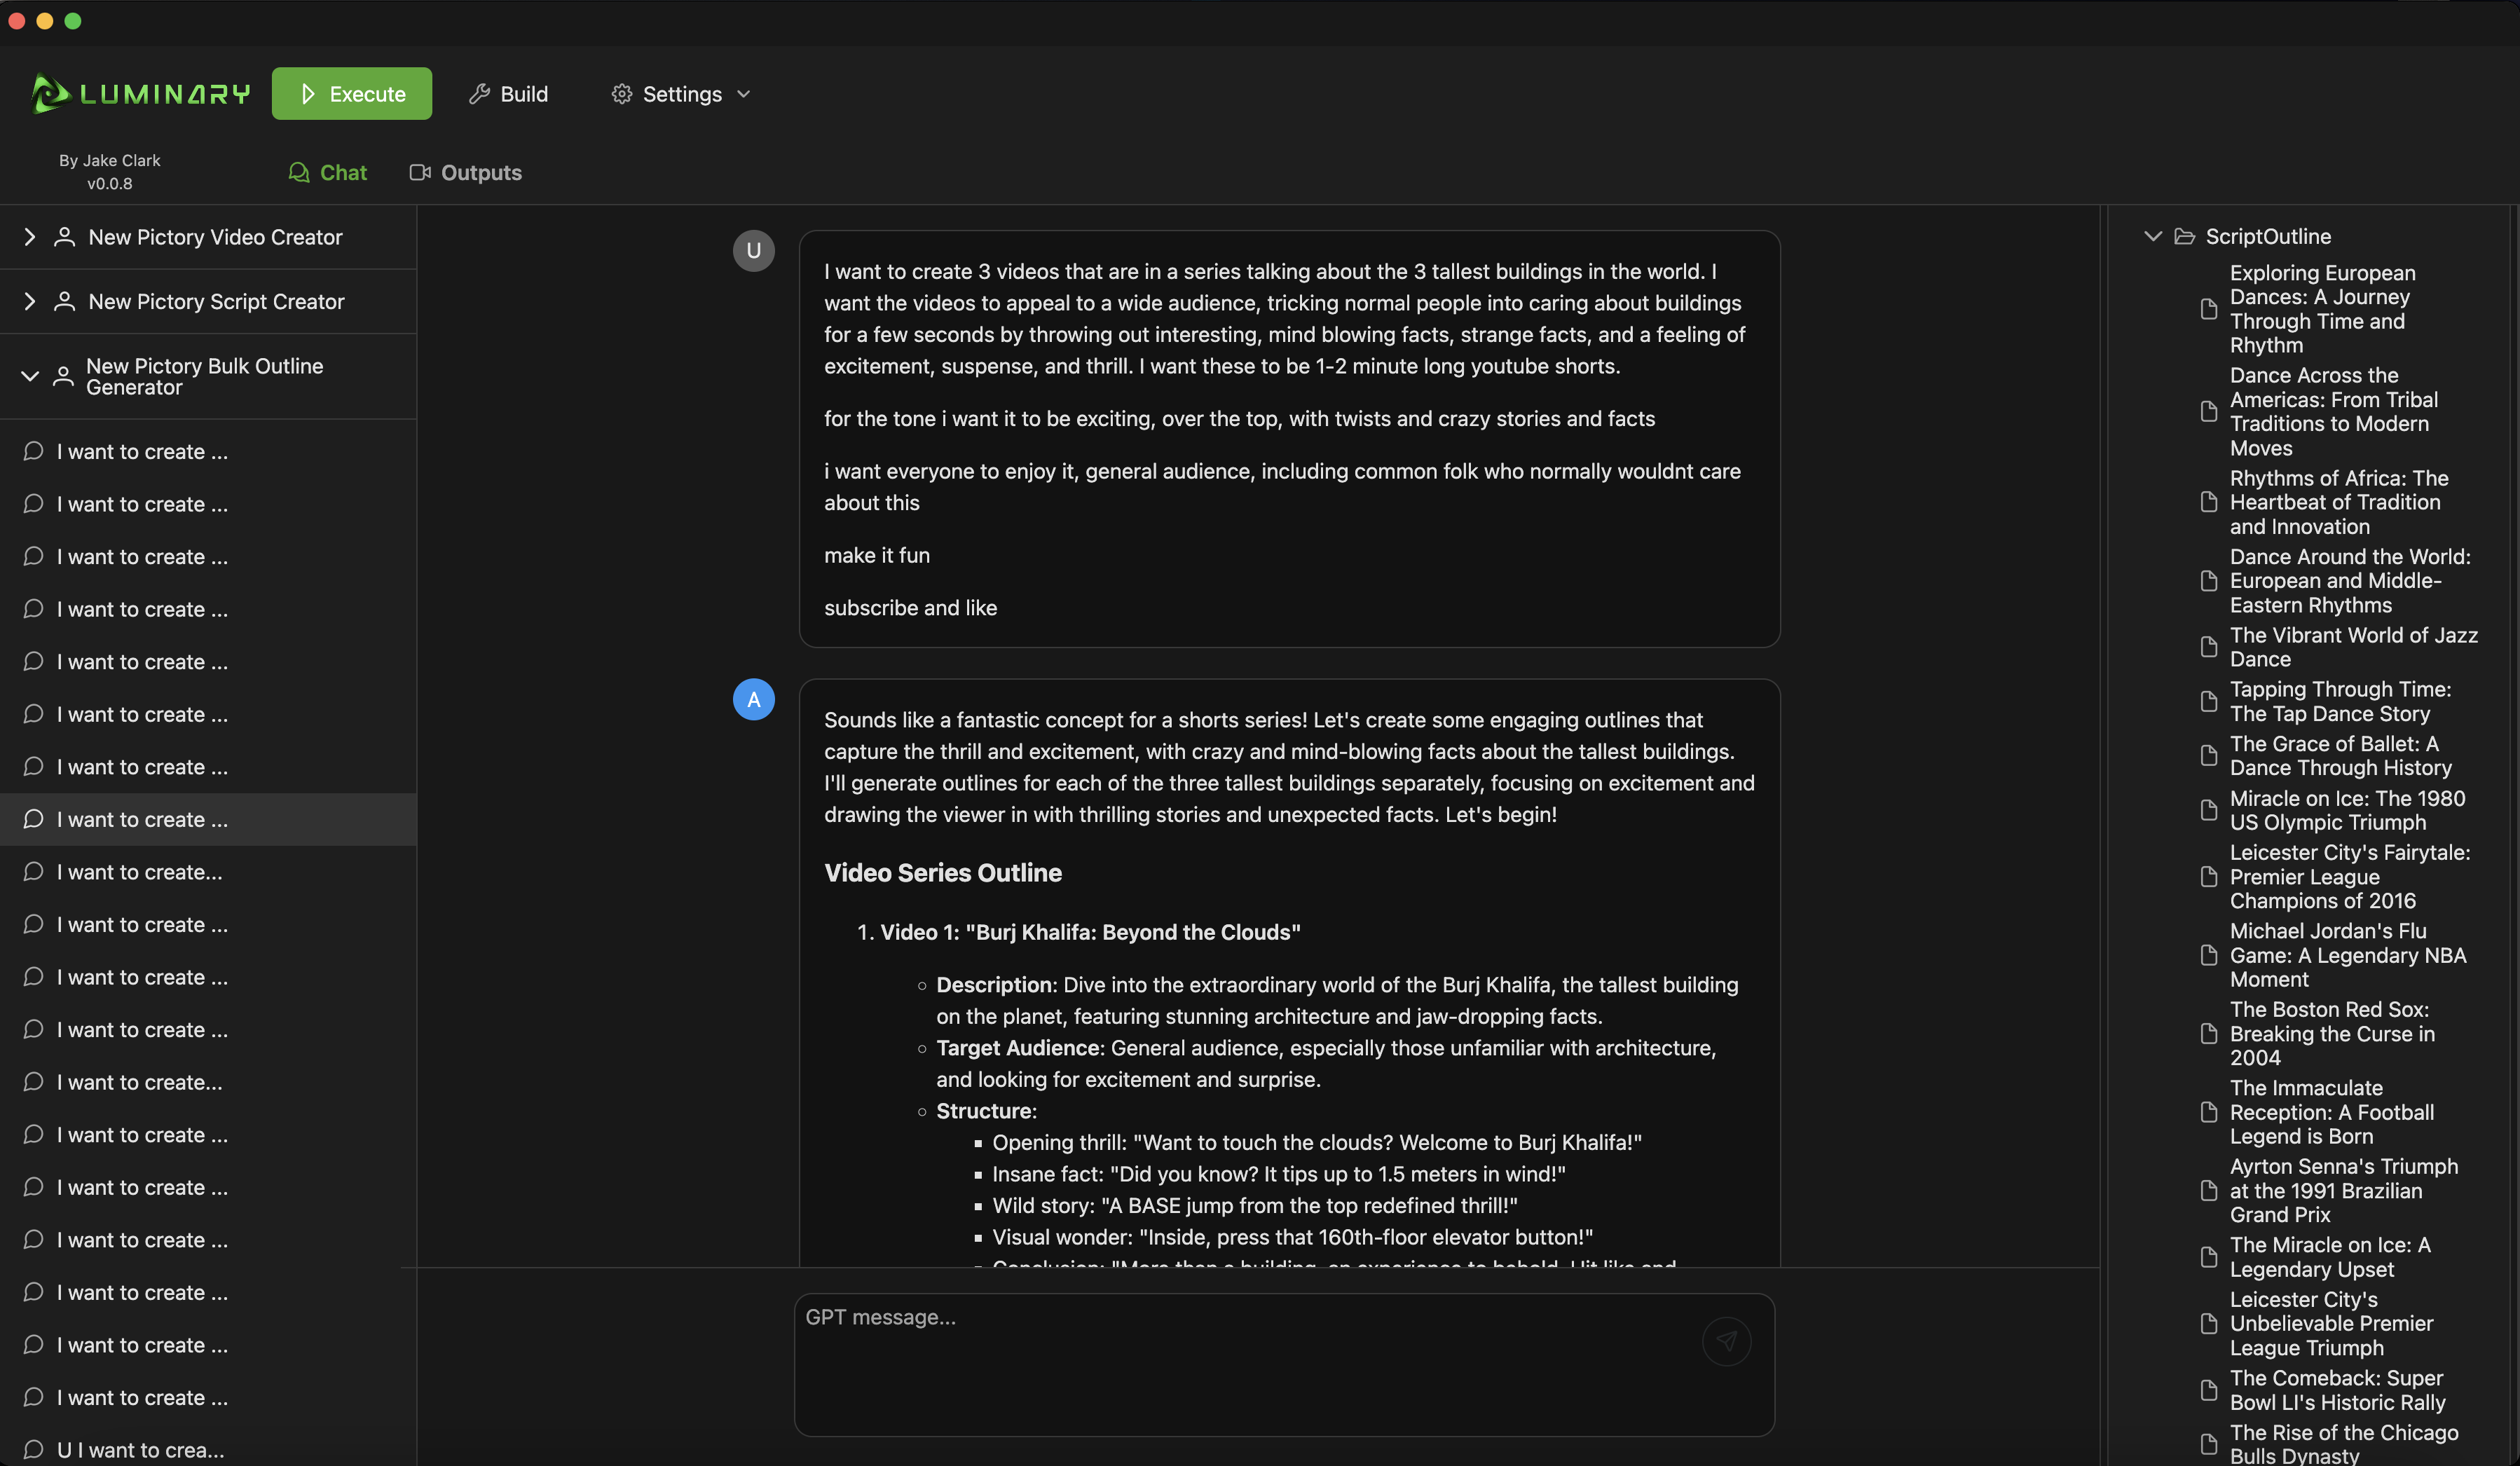
Next, set up the assistants that will process your data:
- Create a new assistant in the Assistant Configuration interface.
- Write system instructions to define the assistant's role and behavior.
- Attach necessary tool functions, which may include your custom scripts.
- Specify input and output object schemas:
- For an outline generator: No input, Outline schema as output
- For a script writer: Outline schema as input, Script schema as output
- For a video creator: Script schema as input, Video schema as output
- If you don't select an output function, Luminary will create one automatically.
- Repeat this process for each assistant in your pipeline.
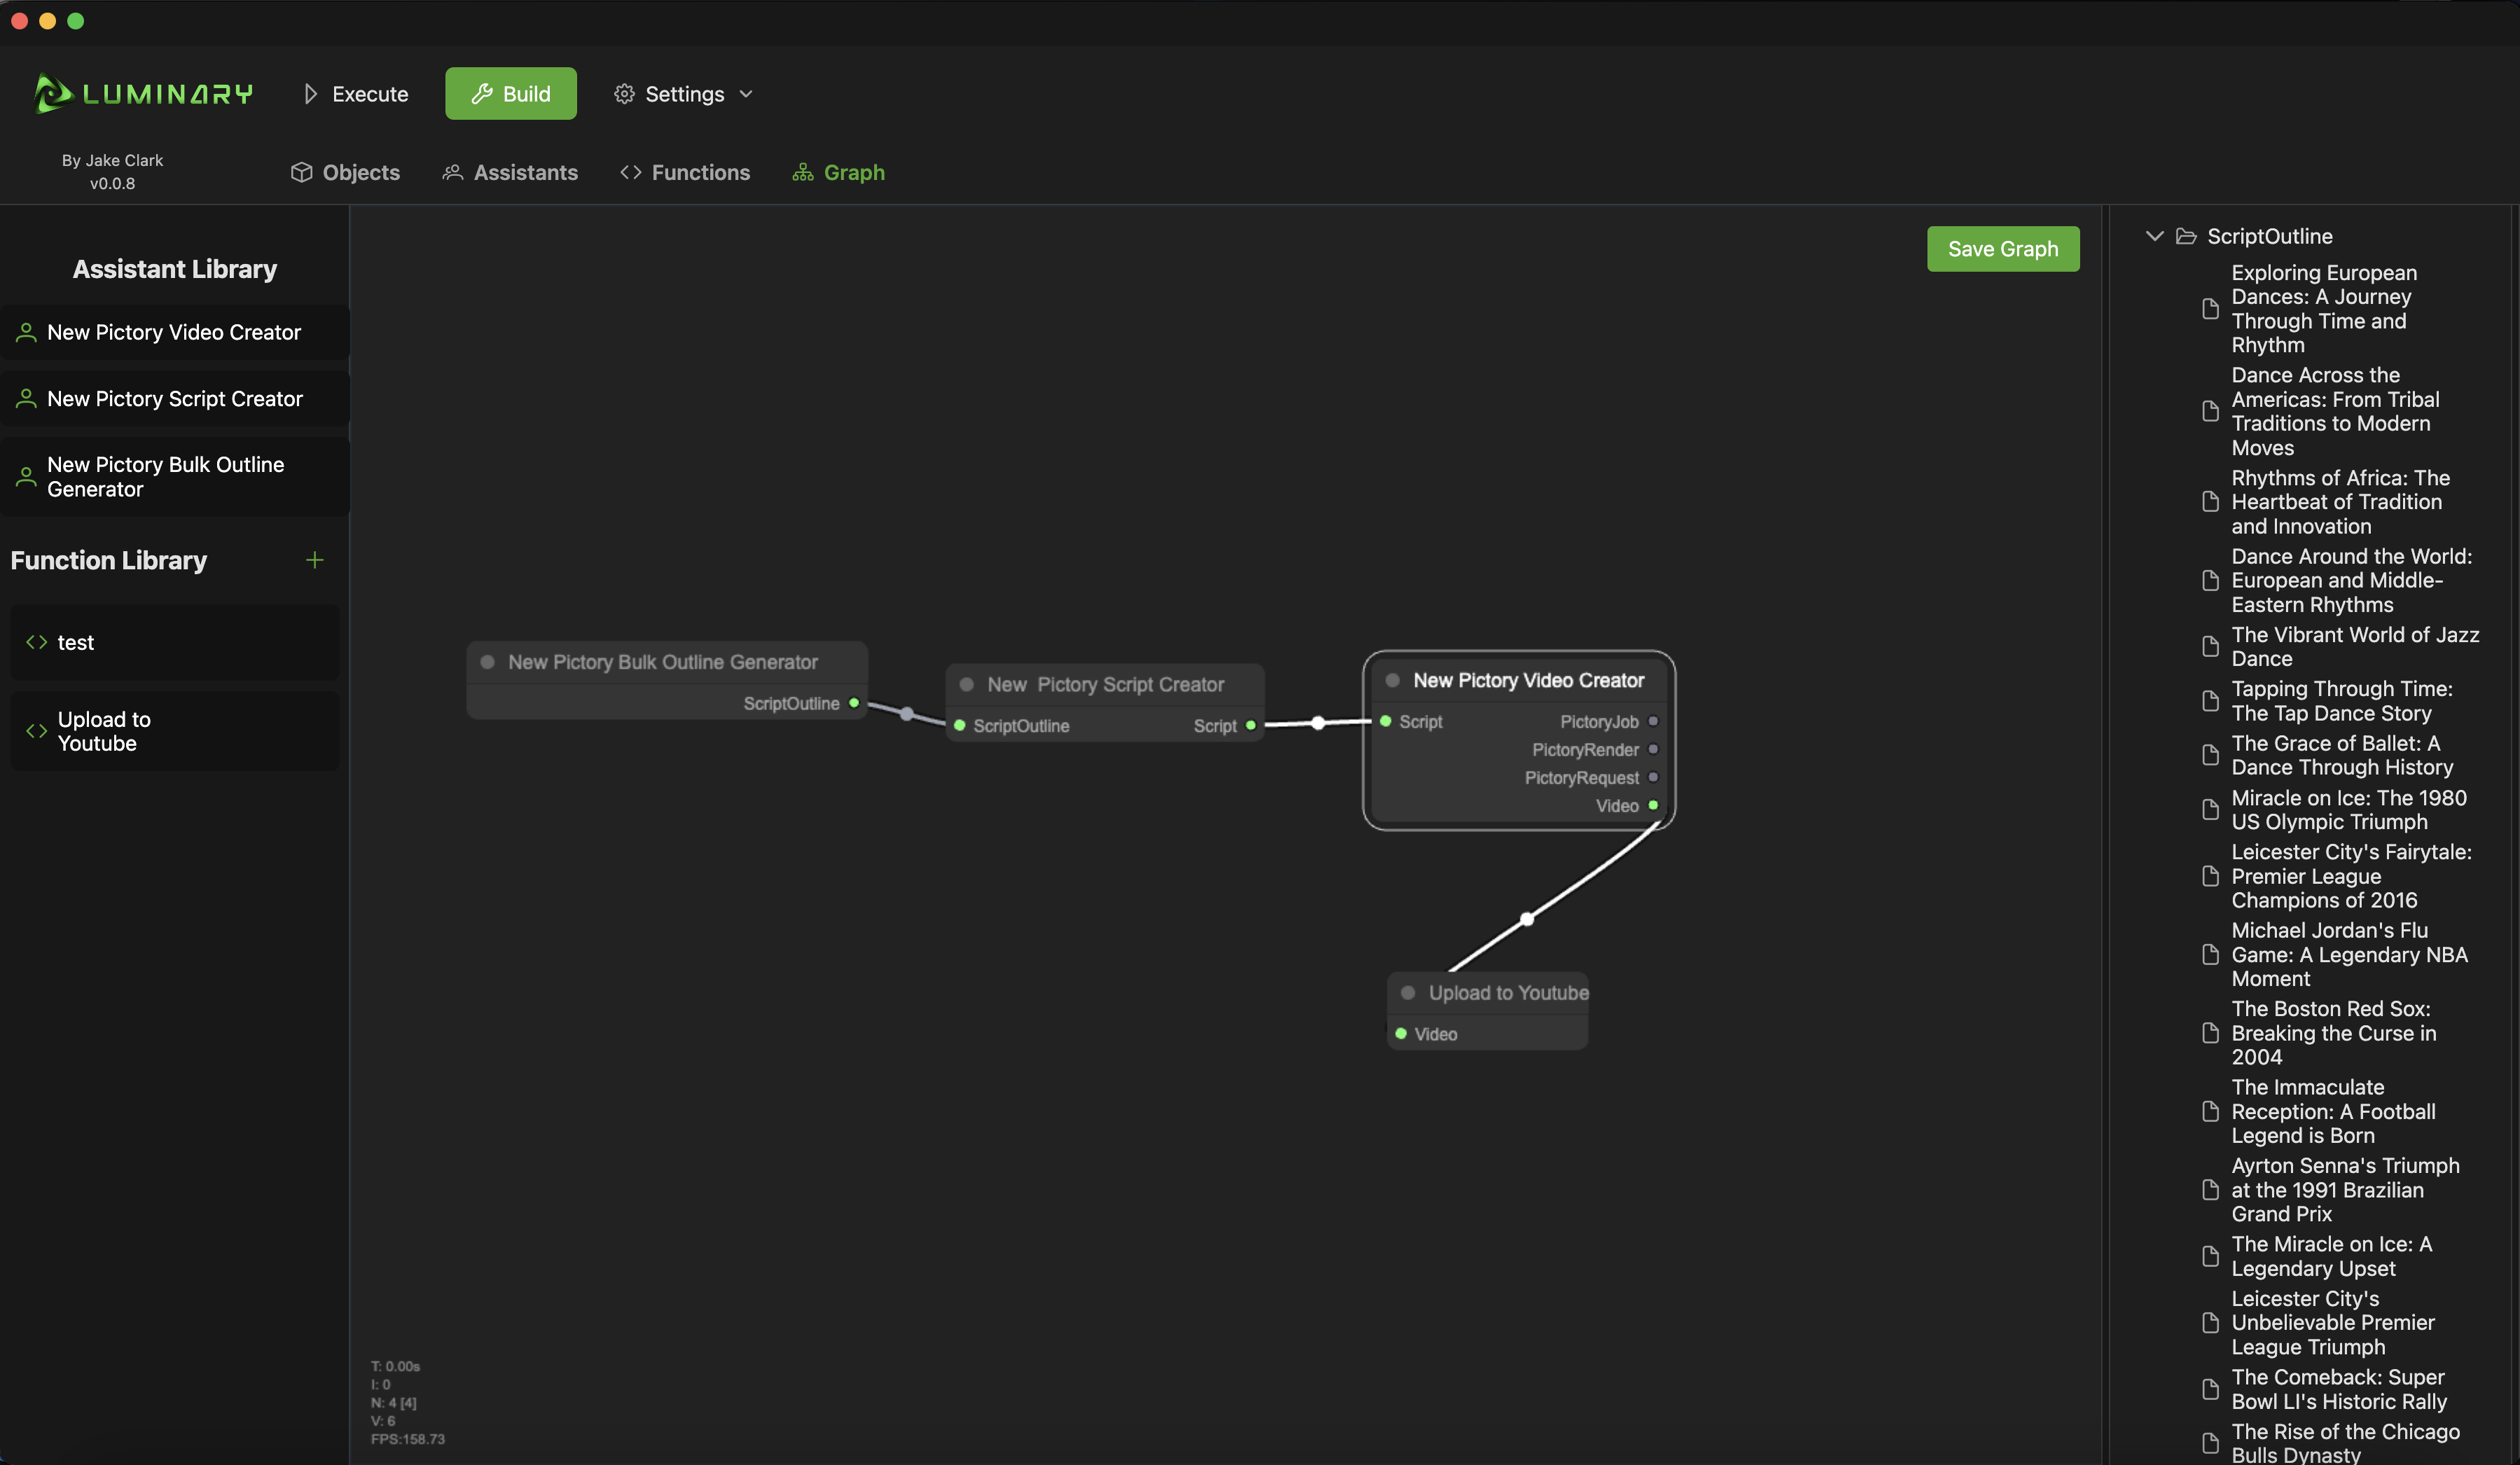
Finally, create the visual workflow using the graph editor:
- Open the Graph Editor canvas.
- Drag assistant nodes from the left library panel onto the canvas.
- Arrange your nodes in the desired workflow order.
- Connect nodes by dragging from an output dot to an input dot:
- Outline Generator output to Script Writer input
- Script Writer output to Video Creator input
- Ensure connections are between compatible object schema types.
- Luminary will validate connections to prevent type mismatches.
- Add any branching or conditional flows as needed.
- Test your pipeline using the debug tools provided.
By following these steps, you'll create a fully functional AI pipeline in Luminary, with data flowing seamlessly between your custom assistants.
Profiles in Luminary organize and contain AI workflows. Each profile includes the components needed to run AI pipelines.
A profile contains:
- Pipeline configurations
- Assistant definitions
- Object schemas
- Custom functions
- Graph layouts
Profiles and related files are stored in a .luminary file in your User directory:
- Windows:
%userprofile%\.luminary - macOS:
~/.luminary
Luminary is installed in the following directories:
- Windows:
%AppData%/Luminary - macOS:
~/Library/Application Support/Luminary
The settings menu allows you to:
- Create new profiles
- Import profiles from zip files
- Export profiles
- Switch between profiles
Profiles work with:
- Desktop application via zip files
- Pipeline engine library
- Version control systems
Projects help organize different aspects of your AI workflows within profiles.
- Sort generated content
- Handle scheduled events
- Track executions
- Separate development and production work
Through the settings menu, you can:
- Create and remove projects
- Monitor resources
- Set access controls
- View activity logs
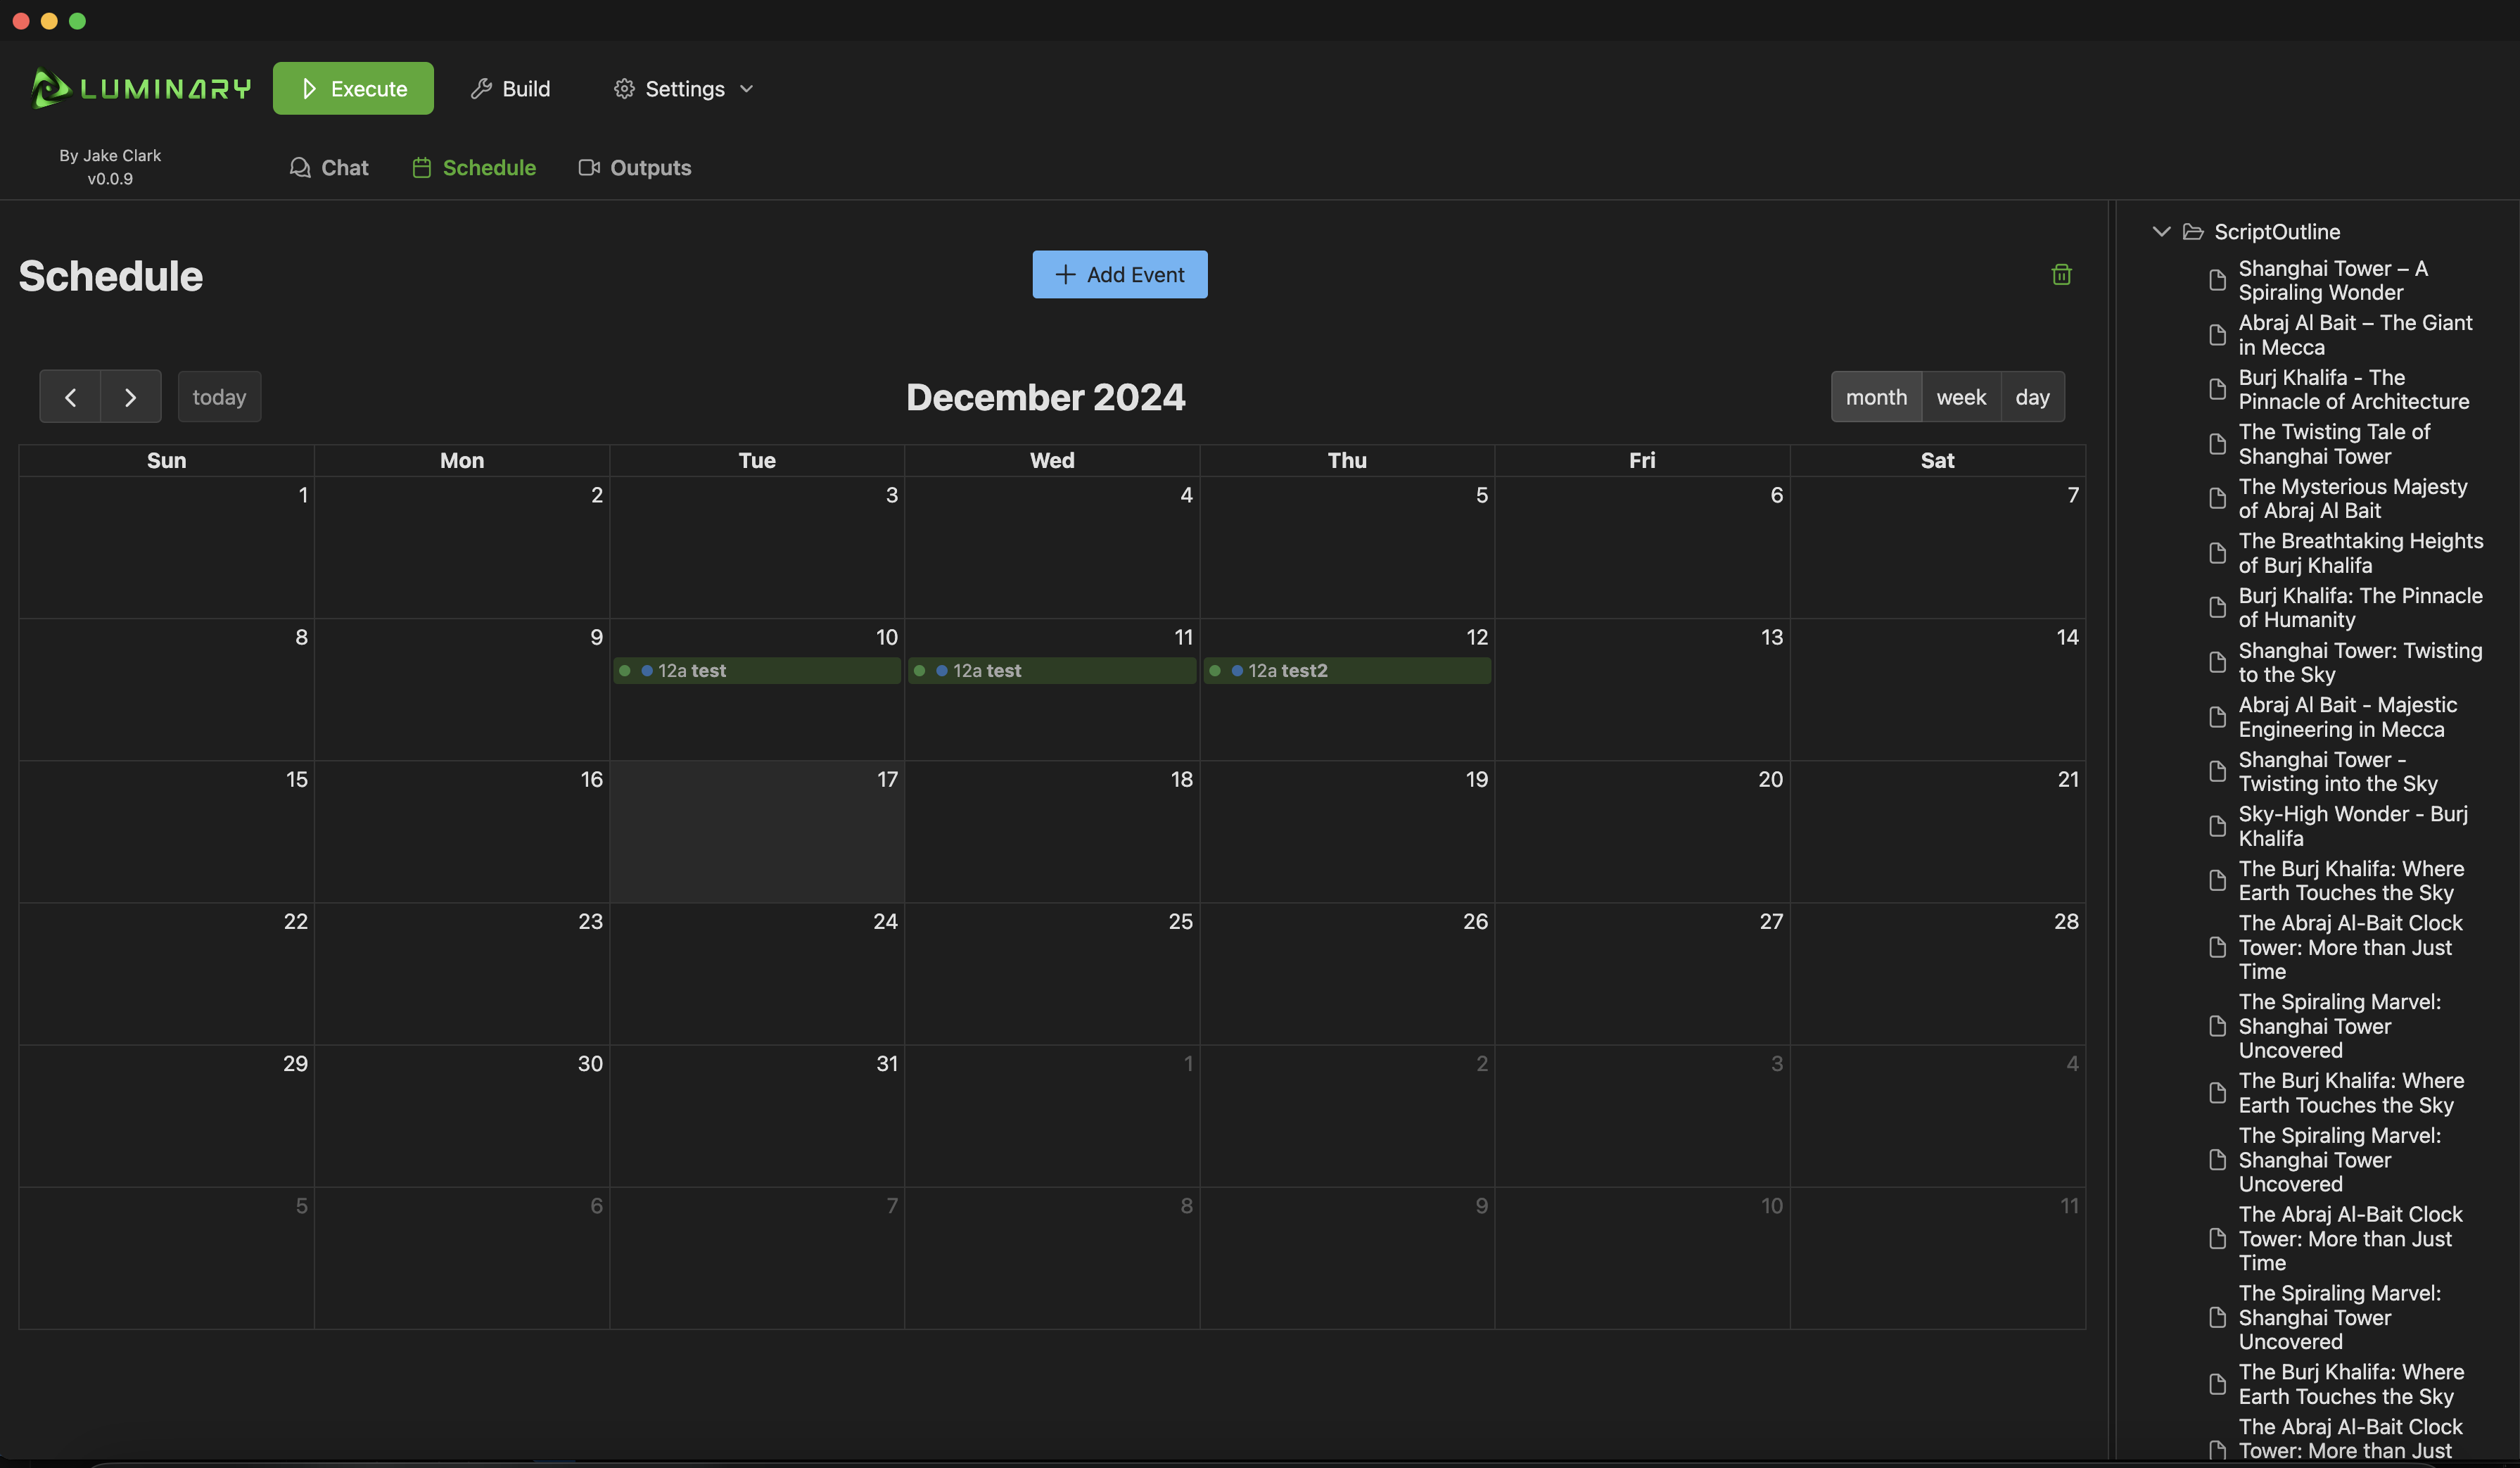
Luminary includes a scheduling system complete with a calendar view for easy scheduling. You can schedule tasks to run at specific times; events can send new messages, or objects generated in the past.
Scheduling allows you to:
- Schedule tasks to run at specific times
- Set up recurring tasks, weekly or monthly
- Monitor task executions
Example usage:
- Generate a video, object is saved
- Schedule object to be passed to the Upload To Youtube function/assistant in one week.
Functions allow custom code execution in your AI pipelines, enabling integration with external systems and data processing. You can bring your own code for each function you create. Any language is supported as long as the script can be executed by a terminal command.
What is an AI Tool function? AI Tool Functions = Actions performed by the AI
Tool functions allow assistants to execute code. These functions can be used to perform tasks like data processing, data analysis, or data transformation. The code that is executed is code you write, or import. The code does not run in OpenAI's servers. Instead it runs within Luminary on your local machine.
In order for the AI to call your function you must setup a tool definition. Luminary helps you do this in the assistant editor. A tool definition is simply a JSON object that defines the input and output schemas for your function. This is what tells the AI how to call your function, what parameters are available, and what the function is used for.
Functions can be used as:
- Assistant Tools: Code that assistants can execute
- Standalone Nodes: Independent processing steps in your pipeline
Assistant tool functions have the option to be marked isOuptut. When this is set to true, the function will be used as the output function for the assistant. If no output function is set, Luminary will create one automatically, based on the outputs defined in the assistant's tool definition.
Object Schema fields can be marked as isMedia. When this is set to true, the field will be used to store media files. isMedia fields are automatically downloaded when outputted from AI assistants or assistant tool functions.
To create a custom function in Luminary:
-
Write your function code: Choose any language that can be executed via command line. Here are examples in JavaScript and Python:
JavaScript Example (function.js):
#!/usr/bin/env node

function finalOutput(output) {
  console.log('$%*%$Output:' + JSON.stringify(output));
}

async function main() {
  try {
    const inputs = JSON.parse(await new Promise(resolve => process.stdin.once('data', resolve)));

    const { title, content } = inputs;

    // Your function logic here
    const processedContent = content.toUpperCase();

    const result = {
      title: title,
      processedContent: processedContent
    };

    finalOutput(result);
  } catch (error) {
    console.error(JSON.stringify({ error: error.message }));
    process.exit(1);
  }
}

main();
Python Example (function.py):
#!/usr/bin/env python3
import sys
import json

def final_output(output):
    print('$%*%$Output:' + json.dumps(output))

try:
    inputs = json.loads(sys.stdin.read())

    title = inputs['title']
    content = inputs['content']

    # Your function logic here
    processed_content = content.upper()

    result = {
        'title': title,
        'processedContent': processed_content
    }

    final_output(result)
except Exception as e:
    print(json.dumps({'error': str(e)}), file=sys.stderr)
    sys.exit(1)
-
Set up the function in Luminary:
- Script File: Point to your script file (e.g.,
function.jsorfunction.py). - Execution Command:
- For JavaScript:
node function.js - For Python:
python function.py
- For JavaScript:
- Define Input/Output Schemas:
Input Schema:
Output Schema:
{ "type": "object", "properties": { "title": { "type": "string" }, "content": { "type": "string" } }, "required": ["title", "content"] }{ "type": "object", "properties": { "title": { "type": "string" }, "processedContent": { "type": "string" } }, "required": ["title", "processedContent"] }
- Script File: Point to your script file (e.g.,
-
Important Factors:
- Use
$%*%$Output:prefix for final output in both languages. - Handle errors and output them as JSON to stderr.
- Parse input from stdin as JSON.
- Ensure your script has proper execute permissions (chmod +x for Unix-like systems).
- Use
-
Testing: Use Luminary's built-in tools to test your function:
- Provide sample inputs matching your input schema.
- Verify the output matches your output schema.
- Test error scenarios to ensure proper error handling.
By following these steps, you can create custom functions that seamlessly integrate with Luminary's AI pipelines, allowing for powerful data processing and external system interactions.
Functions use standard streams:
- Input: JSON via stdin
- Status: Updates via stdout
- Results: Use '$%*%$Output:' prefix with JSON
- Errors: Standard stderr handling
Functions can output:
- Single schema objects
- Multiple objects by schema
- Object arrays
console.log('$%*%$Output:' + JSON.stringify({
  title: "My Processed Content",
  processedContent: "THIS IS THE UPPERCASE CONTENT"
}));Schema names for this example are: Video, Pictory Request, Pictory Render, Pictory Job
console.log('$%*%$Output:' + JSON.stringify({
  video: { id: "123", url: "https://example.com/video.mp4" },
  pictoryRequest: { content: "Original content here" },
  pictoryRender: { status: "complete", progress: 100 },
  pictoryJob: { id: "job123", status: "finished" }
}));console.log('$%*%$Output:' + JSON.stringify({
processedItems: [
{ id: 1, content: "FIRST ITEM" },
{ id: 2, content: "SECOND ITEM" },
{ id: 3, content: "THIRD ITEM" }
]
}));The /functions/ directory includes:
- JavaScript and Python examples
- Input/output patterns
- Status update examples
- Error handling templates
Current development plans include:
- Event Scheduling: Automated pipeline execution (done)
- LangChain Integration: Additional AI model support
- AI Building Tools: Simplified assistant setup
- Development Tools: Enhanced debugging and code support
- More model options
- Pipeline templates
- Team development features
- Enterprise tools
Created by JakeDoesDev with support from developers and AI enthusiasts.
Join our Discord for:
- Technical help
- Feature discussions
- Resources
- Updates
Luminary was created by Jake of JakeDoesDev.com
This project builds on the GPT Assistant UI by PaulWeinsberg, extending it into a development platform while maintaining open-source principles.
Made with Windsurf
MIT License. See LICENSE.md for details.
Thanks for checking out Luminary!
If you find it valuable, drop a star and help grow our community. Enjoy building your AI pipelines!


