-
Notifications
You must be signed in to change notification settings - Fork 11
/
Copy pathREADME.Rmd
131 lines (100 loc) · 4.62 KB
/
README.Rmd
1
2
3
4
5
6
7
8
9
10
11
12
13
14
15
16
17
18
19
20
21
22
23
24
25
26
27
28
29
30
31
32
33
34
35
36
37
38
39
40
41
42
43
44
45
46
47
48
49
50
51
52
53
54
55
56
57
58
59
60
61
62
63
64
65
66
67
68
69
70
71
72
73
74
75
76
77
78
79
80
81
82
83
84
85
86
87
88
89
90
91
92
93
94
95
96
97
98
99
100
101
102
103
104
105
106
107
108
109
110
111
112
113
114
115
116
117
118
119
120
121
122
123
124
125
126
127
128
129
130
---
output: github_document
---
```{r setup, include = FALSE}
knitr::opts_chunk$set(
collapse = TRUE,
comment = "#>",
eval = FALSE,
fig.align = "center"
)
```
# {pdfreport}
<!-- badges: start -->
[](https://github.com/statnmap/pdfreport/actions)
<!-- badges: end -->
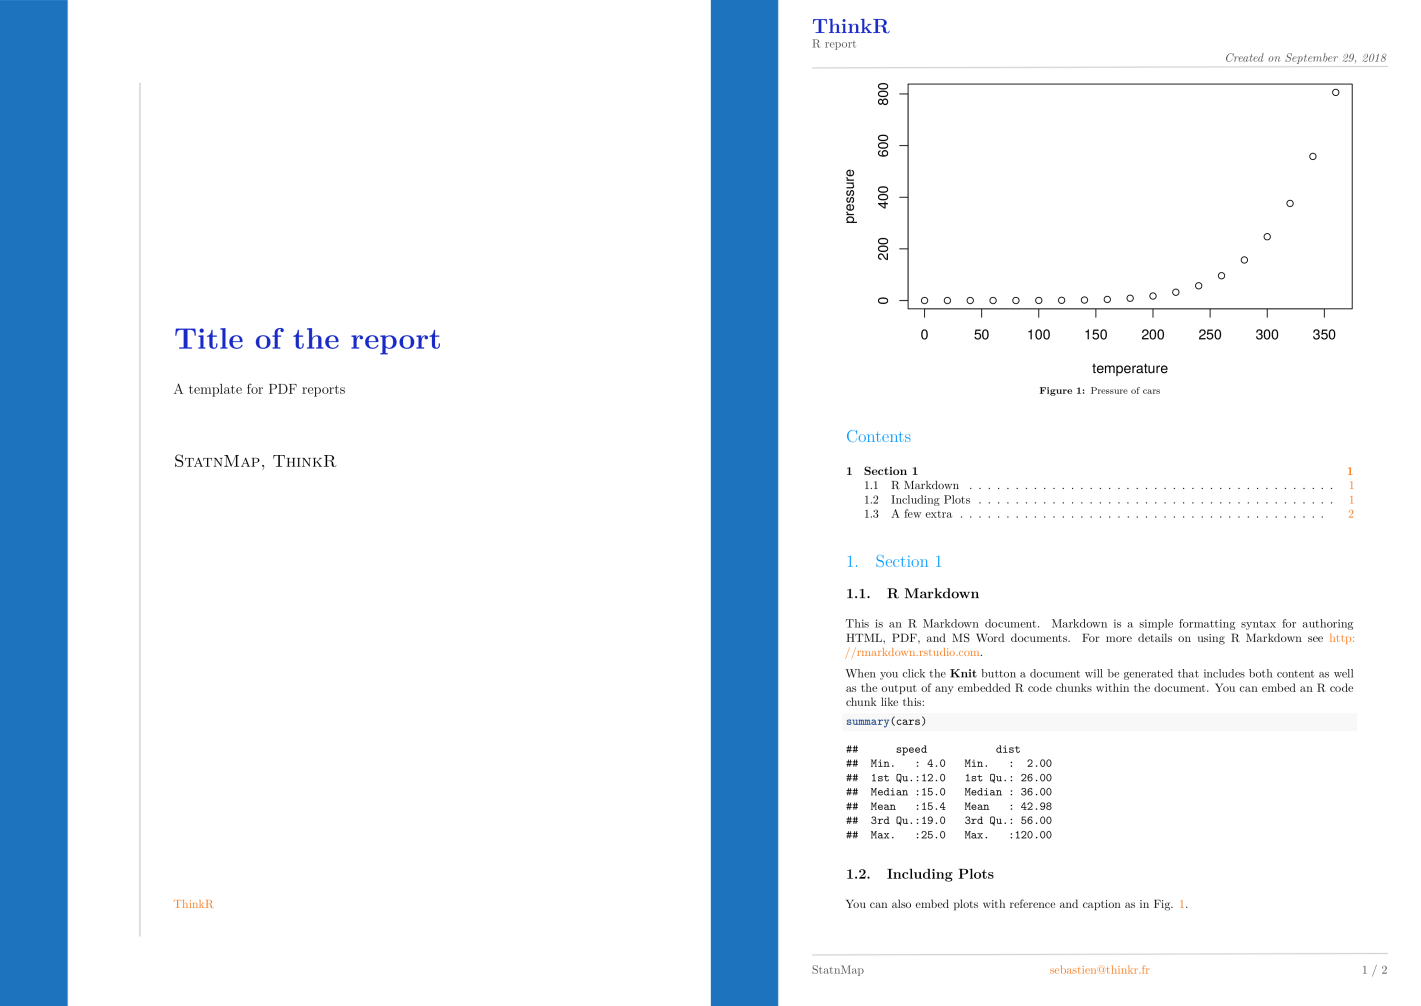
You can create custom PDF templates for your reports without worrying about the lateX code. The template presented creates a first cover page and following pages with custom header, footer and background.
## General use
Fonction `prepare_for_knit` will prepare everything you need in the directory of your Rmd file. You can even ask it to directly knit your pdf in the `output_dir` directory.
There is a template example in the package that you can prepare with the following command lines. The YAML is automatically filled with the correct options. Run these lines to see the results in PDF.
Later, you can use your own parameters as describe in the next sections.
```{r, eval=FALSE}
library(pdfreport)
# Define your paths
path_to_my_rmd <- system.file("example/template_example.Rmd", package = "pdfreport")
output_directory <- tempdir()
# Create the default report
prepare_for_knit(rmd.path = path_to_my_rmd,
knit = TRUE, output_dir = output_directory)
```
||
|:---:|
|Preview of the PDF template. Title page and normal page.|
## Installation
Available on Github only.
```{r, eval=FALSE}
# install.packages("devtools")
devtools::install_github("statnmap/pdfreport")
```
## Custom parameters
You have to fix the following parameters to customise the template with your own information.
### Title page information
```{r}
author <- "@StatnMap"
title <- "Title of the report"
description <- "A template for PDF reports"
company <- "ThinkR"
company_url <- "https://rtask.thinkr.fr"
```
### Normal page header and footer
```{r}
slogan <- "R report"
created_on <- "Created on"
email <- "sebastien@thinkr.fr"
```
### Other options
```{r}
link.col <- "#f67412"
section.color <- "#0099ff"
main.col <- "#192ac7"
lang <- "en" # For latex text formatting specificities, date format, ...
```
### Background
Background are images. This is why header, footer and margins are fixed in this template.
In the package, you will find `svg` files that you can open with "Inkscape" to modify the templates. There is one `svg` file for the title page `Background_Title_light.svg` and one for normal pages `Background_light_topdown.svg`. Export your image as `png` and you will be able to use them as background images. You can also directly use the one provided in the package.
```{r}
bg <- system.file("img/Background_lightblue_topdown.png", package = "pdfreport")
bg.title <- system.file("img/Background_Title_lightblue.png", package = "pdfreport")
```
## Create your own template
**You need to create a Rmd file before.** The function will only help you create the different LateX files and fix options in the YAML to render your PDF. Using `prepare_for_knit`, you will prepare everything you need (files will be copied in your Rmd folder). With option `knit = TRUE`, this will directly render the PDF. But you will still be able to knit your PDF manually if you have to change the content of the Rmd. In this case, try to not modify the YAML or re-run `prepare_for_knit` before.
```{r}
# Define your own already created Rmd file
rmd.path <- system.file("example/template_example.Rmd", package = "pdfreport")
# Prepare and run options (All options are listed here)
prepare_for_knit(
rmd.path,
fig_caption = TRUE, keep_tex = FALSE,
number_sections = TRUE, toc = TRUE,
lang = lang, out_format = c("pdf_document2", "pdf_book")[1],
author = author,
title = title, description = description,
email = email,
slogan = slogan, created_on = created_on,
bg = bg, bg.title = bg.title,
link.col = link.col, section.color = section.color, main.col = main.col,
company = company, company_url = company_url,
knit = TRUE, output_dir = tempdir())
```
```{r, echo=FALSE}
knitr::include_graphics(system.file("img/template_example_demo.png", package = "pdfreport"))
```
## Extra
There are a few extra to color the text according to your options. You can use this lateX code directly in your Rmd file. Knit the `template_example.Rmd` file to test this.
```md
\majorstylecolor{Text with same color as main title}
\urlstylecolor{Text with same color as url}
\sectionstylecolor{Text with same color as section title}
\keyword{To put some word in darkred}
\advert{To put some words in orange and italic}
```